Carpenter Work in Pakistan: Skills, Duties and Tools
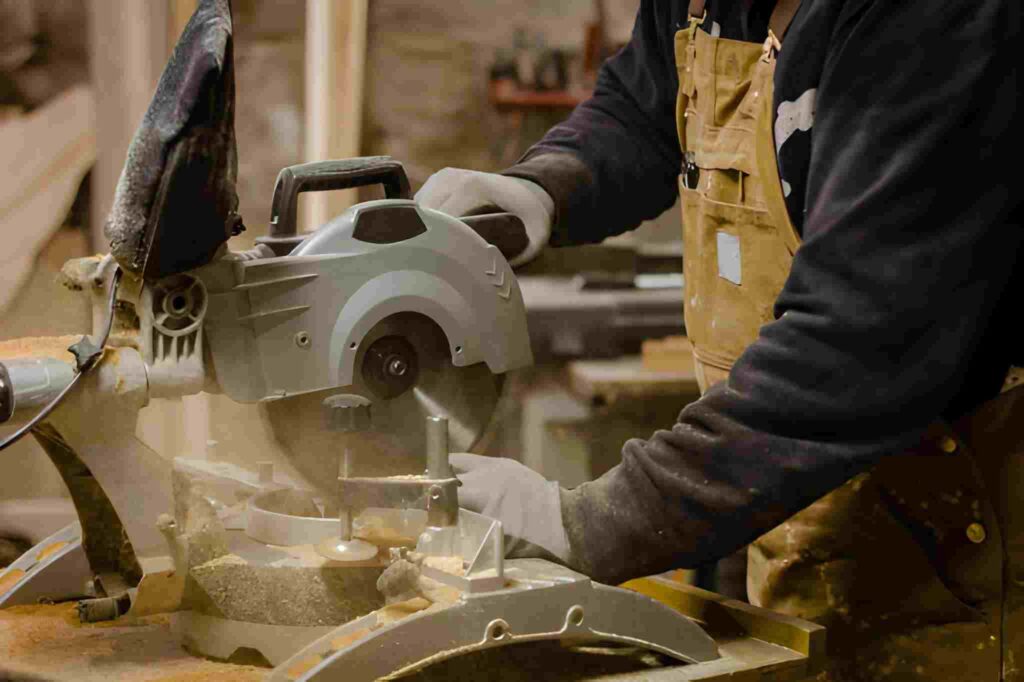
Carpenter Work in Pakistan: Skills, Duties and Tools In Pakistan, being a carpenter is one of the most important and well-respected jobs in the building, remodeling, and furniture businesses. Carpenters are very important to modern Pakistani homes and businesses. They do a lot of different kinds of woodwork, from furniture to industrial buildings and residential woodwork. Before choosing a job, many people compare different technical trades. If you are one of those people, reading Carpenter vs Electrician can help you. What Is Carpenter Work in Pakistan? Carpenter work in Pakistan involves building, installing, and repairing wooden structures. This includes furniture construction, door and window installation, roofing frames, cabinets, partitions, and decorative interior elements. Pakistani craftsmanship has a long history of working with wood. There are different types of carpenters who specialize in different areas, from finish carpentry to business installations. What You Need to Know to Be a Carpenter 1. Technical Skills Getting exact measurements and cuts of wood Learning how to do structure carpentry How to join and fit things Reading plans and drawings for a building site Making beds, cabinets, and tables and other furniture 2. Practical Skills Skills with both hand and power tools Methods of finishing, like shining, sanding, and varnishing On-site fixing of problems and accuracy 3. Soft Skills The Conversation Paying close attention to Managing your time Getting to know customers What Pakistani Carpenters Need to Do and Should Do 1. Planning & Layout The area is analyzed, the sizes are measured, and then the structure is planned. 2. Construction Work Includes framing, roofing support, and heavy-structure carpentry. 3. Furniture Making Pakistan is known for making unique furniture by hand. For upgrades and inspiration, explore Carpenter Furniture Ideas. 4. Repair & Restoration Many homeowners require wood repairs, which is covered in detail in Carpenter Services for Furniture Repairs. 5. Finish Work Putting on the finishing touches, polishing, and putting on the trim and baseboards. Different Types of Karachi Carpenter Work 1. Residential Carpentry Includes home furniture, cabinets, wardrobes, doors, and ceilings. More detail here: Commercial Carpenter vs Residential Carpenter 2. Commercial Carpentry Shop fittings, office partitions, counters, and interior structures. 3. Finish Carpentry Articles about refinements and trims can be found in Finish Carpenter vs Trim Carpenter 4. Furniture Carpentry Custom beds, tables, shelves, dining sets, and wardrobes. 5. Pest-Protection Carpentry Wood is prone to insect damage in Pakistan, especially ant colonies. More help right here: How to Get Rid of Carpenter Ants Tools that every carpenter must have Hand Tools Picks for carpenters Chisels Hammers Screwdrivers Handsaw Measuring tape Squares Power Tools Drills Circular saw Router Jigsaw Sander Finishing Tools Polishing pads Varnish spray Sandpaper Carpenters in Pakistan can get training and find work. Carpenter jobs in Pakistan have a lot of room for growth, especially since more people want to live in their own homes. 1. Apprenticeships Learning the traditional way from a great carpenter with a lot of experience. Full information here: Carpenter Apprenticeship Programs 2. Technical Certifications TEVTA, NAVTTC, and vocational institutes offer structured carpentry courses. 3. Professional Advancement Those wanting to enter carpentry professionally should read: How to Become a Carpenter in 2025 Carpenter Insurance in Pakistan Many carpenters running workshops or small teams also consider insurance for safety and financial protection. More information here: Carpenter Insurance Explained Cost of Carpenter Work in Pakistan Carpentry charges vary depending on: City Type of wood Design complexity Labor cost Average pricing ranges from Furniture and home decor cost between 500 and 3000 rupees per square foot. Problems That Come Up at Work A lot of the time, Pakistani builders deal with Costs of good wood going up Not much high-tech equipment in smaller towns Termite problems Power tools can be dangerous. Rivalry in the market Conclusion In Pakistan being a carpenter is a good way to make a living and an important job for both homes and businesses. From custom furniture to major construction components carpenters deliver long lasting craftsmanship. 1With the right skills tools and training anyone can build a successful future in carpentry in Pakistan. FAQs What is carpenter work in Pakistan? In Pakistan carpenters build place and fix things made of wood like doors windows cabinets furniture roofs and parts of interior design. Carpenters work with natural wood MDF plywood and engineered boards. How much does carpenter work cost in Pakistan? Carpentry costs depend on the city, material type, and design complexity. Usually prices range from Rs. 500 to Rs. 3000.00 per square foot for furniture wardrobes and woodwork inside. What tools are commonly used in carpenter work? Hammers chisels carpenter pencils saws and measure tapes are some of the hand tools that carpenters use. Power tools like drills, circle saws, routers, sanders, and jigsaws are also used. Is carpentry a good career in Pakistan? Yes. Due to rising construction and furniture demand carpentry offers excellent earning potential. Skilled carpenters can work independently join companies or open workshops. Do carpenters in Pakistan need formal training? Not necessarily. Many start through apprenticeships. However, formal technical training from TEVTA, NAVTTC, or vocational schools helps improve skill level and earning prospects. External References Carpenter Work: Go Construct Bls.Gov: Carpenter
Carpenter Pencils: Purpose, Types and How to Use Them
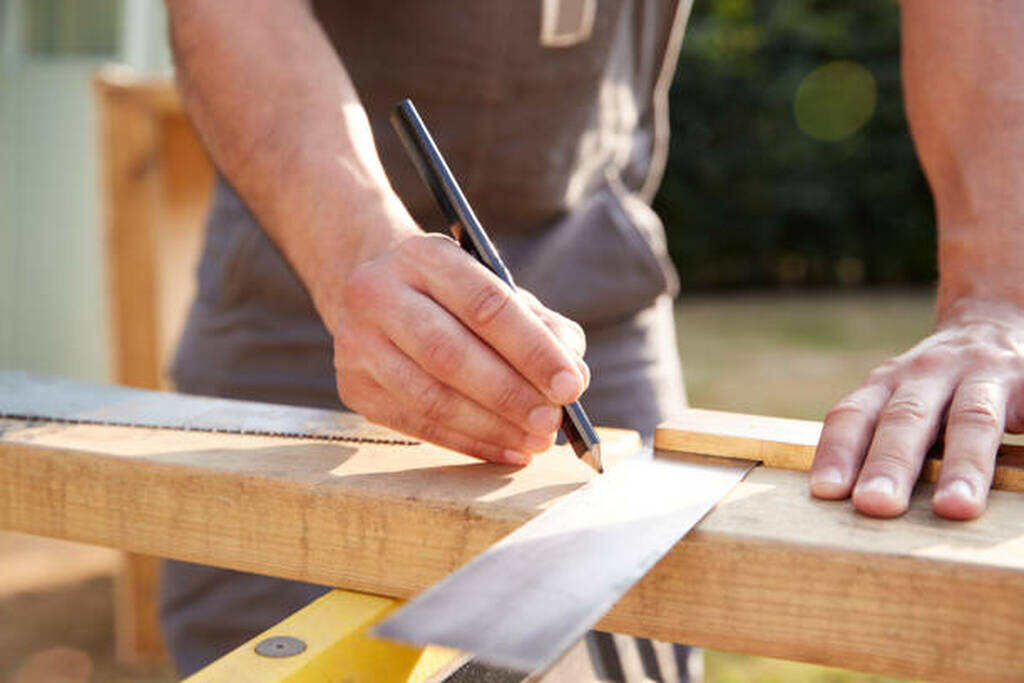
Carpenter Pencils: Purpose, Types and How to Use Them When it comes to marking timber, concrete, and other rough job-site surfaces, carpenter pencils are among the most reliable tools a tradesperson can carry. Their flat shape, durable lead, and ease of handling make them essential for carpenters whether you’re working on commercial carpentry or detailed finish carpentry. If you are starting a trade and exploring career options, you may also compare fields like woodworking and electrical work learn more here: Carpenter vs Electrician – Which Trade Is Right for You? What Makes Carpenter Pencils Unique? A carpenter pencil stands apart from a regular round pencil because of its rectangular or flat body and extra-strong lead. The flat shape prevents it from rolling off sloped surfaces a significant advantage at furniture shops construction sites or during residential carpentry tasks. Learn more about the different work environments: Commercial Carpenter vs Residential Carpenter Carpenter pencils were developed specifically to mark rough materials like timber, stone concrete and drywall situations where a normal pencil would break or create weak lines. Purpose and Common Uses Key Applications Marking lumber for measurement and cuts Fine layout marking for finish carpenter tasks Marking on rough or uneven surfaces Scribing curves or shapes Spacing during decking or cabinet alignment Want to explore trimming and fine woodworking? Finish Carpenter vs Trim Carpenter Additionally, carpenter pencils serve well during furniture restoration. If you are getting repairs or designing new pieces: Carpenter Services for Furniture Repairs Types of Carpenter Pencils Carpenter pencils come in three primary types: 1. Flat Carpenter Pencils the Old Way Built to last with a wood frame, this tool is perfect for most tasks on the job site. 2. Carpenter Pencils with Motors Great for precise work, and it’s easy to refill or sharpen. 3. Colored Carpenter Pencils For marking darker materials or when lines must stand out. How to Use Carpenter Pencils Proper Sharpening Because of the pencil shape, a utility knife is usually used to sharpen it. Create a chisel-shaped tip to draw fine or bold lines depending on your angle. Marking Techniques Use the flat edge for bold marks Use the narrow edge for precision lines Drag the pencil along a straight edge or angle square Scribe curves by tracing the material’s edge Choosing the Right Carpenter Pencil Ask yourself: Do I need bold or precise lines? Will I work mostly on lumber or fine furniture? Do I prefer wood casing or a mechanical system? For people entering the field and learning tool selection as part of training: Carpenter Apprenticeship Programs – Skills, Pay & Opportunities If you are planning to start your carpentry career soon and want to understand requirements, skills and earnings: How to Become a Carpenter in 2025 Care and Maintenance Keep multiple sharp pencils available Use color coding for purpose Store safely in your tool belt Replace when short or repeatedly breaking If you encounter carpenter ants damaging your woodwork or workshop, here’s a helpful guide: How to Get Rid of Carpenter Ants When Insurance Matters Carpentry tools and workshops face risks like fire, workplace injury, and wood-damage pests. 1Insurance safeguards your carpentry business and equipment.1 Learn more: Carpenter Insurance Explained for Small Business Owners Where Carpenter Pencils Fit Into Furniture Craft From layout marks to curve tracing, carpenter pencils are invaluable in designing or building interiors. If you want DIY creativity inspiration: Carpenter Furniture Ideas Conclusion Whether you are a hobbyist or a professional carpenter, carpenter pencils are essential. Their flat shape, durable lead and ability to mark everything from structural wood to fine furniture make them indispensable across the trade. Questions That Are Often Asked Q1: What do you do with a carpenter pencil? A carpenter pencil can be used to make marks on rough surfaces like concrete, wood, drywall, and more. It holds its shape well because it’s flat, so it won’t roll around while you’re building or working with wood. Q2: Why do builder pencils have a flat top? You can use a carpenter pencil on a sloped surface without it rolling off which is very useful on the job. The flat form is also easier to hold and lets you mark in different thicknesses based on the angle. Q3: Can I not use a carpenter pencil but a normal pencil instead? Yes, but regular pens don’t last as long, break more easily, and don’t leave good marks on rough floor. For building and construction, carpenter pencils make lines that are easier to see and are easier to hold. Q4:How do you sharpen a carpenter pencil? You may use a regular knife or a tool made just for that purpose. Most builders like to use a knife because it has a chisel-shaped tip that lets them make both thick and thin lines. Q5:What kind of lead is used in carpenter pencils? The graphite leads in carpenter pencils are bigger and stronger so they can handle rough surfaces and pressure. Depending on how long they need to last and how visible they need to be, they usually come in hard (H) or soft (B) lead types. External Link Carpenter pencils: Pencil China
Carpenter Tools in Pakistan: Important Equipment Guide
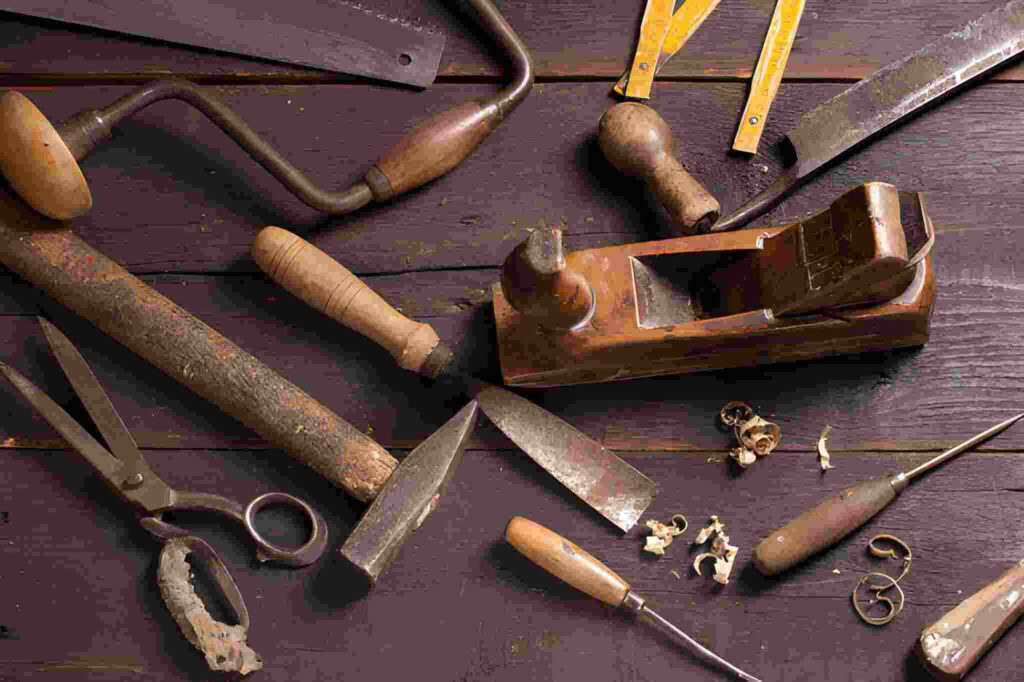
Carpenter Tools in Pakistan: Important Equipment Guide For many years, Pakistan has had one of the most important and recognized trades: carpentry. It shows how well a carpenter can do their job when they use certain tools to fix things or make frames out of wood for furniture. What are the most important Pakistani Carpenter Tools? This guide will explain. It will also show you how to pick the right tools for work or at home. Understanding the Role of Carpenter Tools A builder needs a good set of tools to get the job done quickly and well whether they are working on a business or a home project. Picking the right Carpenter Tools from old-fashioned hand tools to modern power tools can make a big difference in how safe accurate and productive the work is. Know the different tools you can use and how they all work together to make the whole thing if you want to become a carpenter. Learn how to become a carpenter in 2025 by reading How to Become a Carpenter in 2025 or Carpenter Apprenticeship Programs. These books will help you plan your career well. Categories of Carpenter Tools A builder needs two main kinds of tools: hand tools and power tools. Each group can be used in different ways, depending on the project’s size and difficulty. 1. Hand Tools These are very old instruments that you play by hand. For fine finishing, repairs, and work that needs to be done right, these are great. Here are a few popular hand tools: Hammer: Used to drive nails and put wood pieces together. Chisels: Important for shaping and cutting wood. Hand Saw: It cuts wood into various shapes and sizes. Tape Measure: Checks the sizes before cutting and putting things together. Try Square: Helps make sure that right angles are correct. Screwdrivers: To tighten and remove screws in frames and furniture. 2. Power Tools Today more and more people in Pakistan work with wood and they need power tools to do the job quickly and correctly. A lot of people like these power tools: Circular Saw: It cuts wood well and fast. Electric Drill: It’s used to drill holes and attach screws. Jigsaw: Just right for cutting bends that aren’t straight. Planer: Just right for cutting bends that aren’t straight. Router: It helps make parts and edges look good. Sander: Giving wood surfaces a shiny look. Must-Have Carpenter Tools for Pakistani Workshops If you want to start a carpentry shop in Lahore, Karachi, or Islamabad, Pakistan, you will need the following: Work Bench: A strong base that can keep things in place. Measuring Tape & Ruler: Important for planning and accuracy. Clamps: Something strong that can hold things To hold things in place while you glue or cut them strong. Hand Plane: Perfect for leveling and smoothing out areas. Mallet: It is safe to use with chisels to shape wood. Combination Square: It’s easy to draw 45° and 90° lines. Power Drill: It speeds up the process of getting and putting things together. Safety Gear: gloves shields and dust masks to keep everyone safe at work. These are the most important tools for any carpenter, especially those who works in small shops or companies. If you want to start your own woodworking business, you should also read about Carpenter Insurance for Small Business Owners to make sure you are safe and the business will last. Modern Trends in Carpenter Tools in Pakistan Pakistan’s woodworking business has changed a lot over the years. New tools like electric drills laser measuring tools and digital calipers have made working with wood faster and more accurate. Hall Road in Lahore Saddar Market in Karachi and Raja Bazaar in Rawalpindi are all well-known places to buy tools both foreign and made in Pakistan. Online stores like Daraz ToolsBazaar and Pakistan Hardware Store have also made it easier for builders to get good tools without having to leave their shops. Carpenter Tools for Different Specializations Every builder has their own set of tools that they use. The tools can be very different depending on what they do. 1. Finish Carpenters These craftsmen work on furniture, trim, and small details. Find out more about what they do in Finish Carpenter vs. Trim Carpenter. Common tools: Cutting tools, nail guns, sanders, and miter saws are all out there. 2. Commercial Carpenters They work on big projects like stores and office buildings. Check out Commercial Carpenter vs. Residential Carpenter for more information. Common tools: Tools like electric drills, circle saws, and concrete formwork systems. 3. Residential Carpenters These professionals build and repair home interiors. Common tools: Tools like hammers drills saws and screwdrivers. They can also do work like Carpenter Services for Furniture Repairs which fixes tables and builds shelves. Carpenter Tools Maintenance Tips Your tools will last longer and work better if you take good care of them: Clean your tools every time you use them to keep them from rusting. The moving parts should be greased often. Keep your tools somewhere dry. Keep blades and bits sharp when you need to. Check the batteries and power lines for damage or wear. If you follow these maintenance tips your tools will last longer and not need to be replaced as often. Choosing the Best Carpenter Tools in Pakistan When you buy Carpenter Tools think about these things: Purpose: Figure out if you need heavy-duty construction tools or tools for small do-it-yourself jobs. Brand Reputation: Choose names you can trust like Dewalt Bosch Makita or Stanley. Durability: Also, look at the material used to make hand tools. Warranty & Support: In Pakistan choose items that come with help after the sale. Budget: Compare prices at more than one store to get the best deals. Want some unique ideas on how to build furniture? Check out Ideas for Carpenter Furniture. Safety Guidelines for Using Carpenter Tools Safety is the most important thing. Whether you’re a beginner or an experienced worker make sure you follow these important safety rules: Always wear safety
Shuttering Carpenter: Important Skills and Job Duties

Shuttering Carpenter: Important Skills and Job Duties A shuttering carpenter is an important worker in the building business. These people are experts at making models also called forms, that keep concrete in place until it hardens properly. Whether they’re working on homes bridges or skyscrapers shuttering carpenters build the framework that makes things last. This article will talk about the skills, responsibilities, career path, and tools that every shuttering carpenter should have. It will also talk about how this job is similar to others in the industry. What Is a Shuttering Carpenter? A shuttering carpenter who is also called a formwork carpenter makes temporary forms out of wood metal or plastic that are used to pour concrete into for building parts like walls slabs columns and beams. This job needs a lot of expert know-how accuracy and teamwork. Shuttering builders on the other hand mostly work on big building projects and improvements to infrastructure. Their work has a direct effect on how strong and straight the frame of a building is. Key Responsibilities of a Shuttering Carpenter On building sites shuttering carpenters do a range of technical and physical jobs. Some of their main responsibilities at work are: Understanding and reading designs and building plans. Using plywood, wood, or steel to build forms and measuring, cutting, and putting them together. Putting in place formwork methods to shape concrete parts. Release agents are being used to keep the concrete from sticking to the molds. Taking down the molds safely after the concrete has hardened. Updating tools and making sure safety rules are followed on the job spot. Essential Skills Every Shuttering Carpenter Needs 1. Technical Knowledge It is very important to understand building drawings and structure plans. A shuttering builder should be able to accurately figure out lengths and angles. 2. Physical Strength and Stamina Being physically fit is important for this job because it requires lifting heavy things and spending long hours on construction sites. 3. Attention to Detail A structure’s integrity can be compromised by even a small measurement mistake. Focus and accuracy are skills that can’t be compromised. 4. Teamwork and Communication Site engineers, steel fixers, and concrete workers all work closely with shuttering builders. Good communication is key to getting projects done on time. 5. Knowledge of Materials Different projects need different kinds of materials. For example, residential projects need wood formwork, while high-rise buildings need steel formwork. Tools and Equipment Used by Shuttering Carpenters A skilled shuttering carpenter needs to know these things: Assessing spirit levels and tapes Drills and power saws Nails and hammers Bolts and clamps Safety equipment include harnesses, helmets, and gloves Tool maintenance on a regular basis guarantees effectiveness and lowers working risks. Career Path and Training Opportunities Although finishing a carpenter apprenticeship program is a significant advantage, formal schooling is not required to become a shuttering carpenter. Apprenticeships impart practical skills, sophisticated construction methods, and safety procedures. See our guide on Carpenter Apprenticeship Programs Skills Pay & Opportunities for additional information on organized learning opportunities. Many shuttering carpenters begin as assistants and work their way up to supervisory positions or, with more experience, construction foremen. Comparing Shuttering Carpenters with Other Carpenter Types Let’s examine how shuttering relates to a few comparable transactions: Finish Carpenter: focuses on small features inside the house, like cabinetry and trim. Commercial Carpenter: works on big projects like building shops or offices. Furniture Carpenter: specializes in making or fixing furniture out of wood. General Carpenter Services: Does a lot of different home repair and woodworking jobs. Shutting carpentry is still one of the most structurally important jobs in building even if each craft demands different skill sets. Safety Practices and Site Regulations For any carpenter who works on shutters safety comes first. 1Following the rules for safety in your business lowers the chance of having an accident. Important steps include the following: Putting on protective gear (PPE) all the time. checking ladders and platforms on a regular basis. making sure that every tool is in good shape. Not taking steps that put safety at risk. Reporting hazards immediately to supervisors. Organizations like OSHA and CITB provide useful resources and certifications on construction site safety. Earning Potential and Job Outlook The demand for shuttering carpenters continues to rise globally due to infrastructure expansion. Between $20 and $35 an hour will be the average wage in 2025, but it will depend on the skill and location. If they work on government or high-rise jobs, foremen and senior carpenters can make a lot more money. Check out our comprehensive guide on How to Become a Carpenter in 2025 if you’re looking for long-term stability. Conclusion In contemporary construction a shuttering carpenter is an unsung hero. They are good at making correct and long-lasting formwork, which means that concrete buildings will last for a long time. Because of the growing need in both residential and business projects, it’s a great job for people who love craftsmanship, working with others, and being precise with their work. If you want to become a shuttering carpenter, learning what they do is the first thing you need to do to become an expert in the craft of making structures. FAQs About Shuttering Carpenters 1. What is the role of a shuttering carpenter in construction? The shuttering carpenter creates temporary molds or formwork to retain concrete as it cures. These molds form beams columns slabs and foundations. They make sure the concrete sets properly and is strong and accurate. 2. What qualifications do I need to become a shuttering carpenter? A shuttering carpenter generally needs basic schooling on-the-job training or an apprenticeship. Practical skills safety awareness and building site experience are highly necessary. 3. What tools and equipment does a shuttering carpenter use? Shuttering carpenters use saws drills measuring tapes, spirit levels hammers nails and steel clamps. To guarantee safety they wear gloves helmets and boots. 4. How is shuttering carpentry different from other types of carpentry? Shuttering carpenters build robust temporary structures to shape concrete unlike
What Is Rough-In Plumbing and How Does It Work?
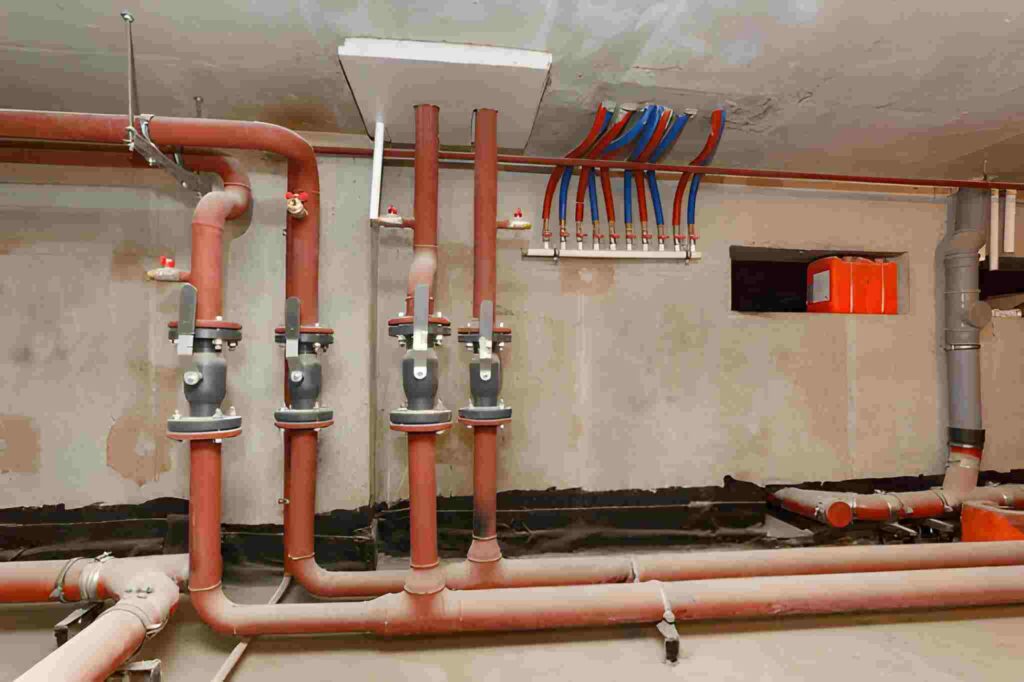
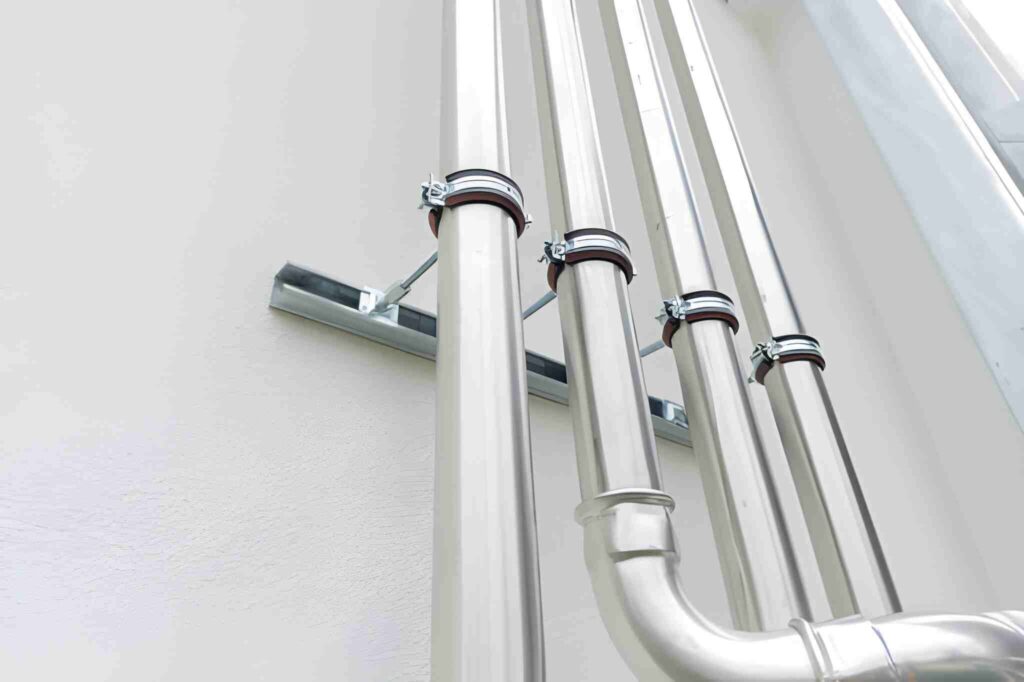
What Is Rough-In Plumbing and How Does It Work? Introduction When constructing or renovating a home, one of the most critical steps before finishing walls and floors is Rough in Plumbing. During this step, the structure’s pipes, drains, and water lines are laid out. If you do it right, it makes sure that water flows smoothly, drains properly, and meets building codes. Rough in Plumbing is the “skeleton” of your plumbing system. It’s everything that goes on behind the walls before you see the fancy taps and fixtures. Knowing how this step works helps homes avoid mistakes that cost a lot of money and makes sure that the final installation goes more smoothly. What Is Rough-In Plumbing? Rough-in plumbing means putting in water lines, drain pipes and venting systems before the final finishes, plasterboard and floors are put down. Plumbers plan out how water will enter and leave your home during this first stage of setup. In general, this process includes: Setting up the main lines for water and drains Putting in vent stacks to control air pressure Getting the base ready for things like toilets, sinks, and showers Making sure the slope and placement are right for gravity-fed drainage Basically, the invisible but important part of plumbing that affects how well your system will work when everything is done. Why Rough-In Plumbing Is So Important Doing a good job with the Rough in Plumbing stage can save you a lot of money on fixes later on. Pipes that aren’t put in properly can leak, overflow, or not have enough water pressure. This is why it’s important: Prevents Future Leaks: Ensures that the pipes are properly connected and sealed. Maintains Water Pressure: The right pipe size ensures even spread of water. Supports Drainage Efficiency: Slow sinks and gurgling sounds can be avoided with the right venting. Ensures Code Compliance: Placement, material, and slope angles are all controlled by local plumbing rules. One example is a vent system that doesn’t work right can cause smells or draining problems. Read our in-depth guide on plumbing air pipes to learn more about this. Phases of Rough-In Plumbing There are three main stages of rough-in work, and each one needs skill and attention to detail. 1. Water Supply Rough-In In this step, the lines that bring clean water to your fixtures are laid. Materials like copper, PEX, or CPVC are often used. To keep water flow at multiple fixtures, each line must be the right size. 2. Drain-Waste-Vent (DWV) Rough-In This system gets rid of waste water and keeps sewer gases from getting into your house. It’s very important to make sure there is enough ventilation, especially in bathrooms, kitchens, and wash rooms. 3. Fixture Layout Finally, plumbers mark where sinks, tubs, toilets, and other items will go in the future. Before the walls are closed, these places are checked to make sure they are accessible and follow the rules. Rough-In vs. Finish Plumbing Many homeowners confuse Rough in Plumbing with finish plumbing. The key difference lies in timing and visibility. Stage Description Visibility Rough-In Pipes, vents, and drains are installed within walls and floors. Hidden Finish Plumbing Fixtures like faucets, toilets, and showers are connected and visible. Visible To put it simply, Rough-In builds the system and Finishing brings it to life. Common Materials Used in Rough-In Plumbing PEX (Cross-linked Polyethylene): It’s bendable, simple to put in place, and won’t rust. Copper: Ideal for both hot and cold water because it is strong and doesn’t melt. PVC: Often used for vent, drain, and waste lines. ABS (Acrylonitrile Butadiene Styrene): Pipe made of strong plastic that is often used in DWV systems. If your house was built many years ago, it may still have old systems like polybutylene lines that need to be replaced when the house is renovated. How Long Does Rough-In Plumbing Take? How long it takes depends on how big and hard the job is. New homes: Three to five days Small renovations: Within two days Commercial buildings: It might take weeks. The schedule is also affected by things like getting building permits, going through inspections, and working with electricians or HVAC experts. Cost Factors of Rough-In Plumbing Several things can change the cost of Rough-In: Size and plan of the home Home’s bathroom and kitchen countHome’s bathroom and kitchen count What kind of pipes are used Being able to get into crawl areas or walls Prices for labour and water rules in your area Talk to a neighbourhood plumber to get an accurate quote. You can read about average prices for installation and replacement in guides like “plumber cost to replace your garbage disposal.” Inspections and Building Codes Every Rough-In work has to follow the rules set by the local plumbing department. Before the walls are sealed but after the pipes are put in, a tester makes sure: Right pipe slopes The right vent links Joints that don’t leak How far apart water and power lines should be A failed inspection can delay a job, so only hire licensed experts. Bathroom and kitchen plumbing that is already roughed in It’s important to plan ahead for bathrooms and kitchens because they have a lot of water sources and drains. Bathroom Rough-In: Includes installation for toilets showers bathtubs and sinks. Correct pipe slopes prevent standing water and odor problems. Kitchen Rough-In: Mostly talks about washbasin drains, dishwasher lines and water hookups for refrigerators. Learn some DIY plumbing tips for your kitchen sink and bathroom to handle small upgrades after Rough-In. Troubleshooting Common Rough-In Issues Incorrect Slope or Alignment: Slows down flow. Improper Venting: Leads to the smell of sewer gas. Leaks at Joints: Usually due to poor soldering or loose fittings. Clogs in Drain Lines: Can occur if debris enters pipes before sealing. For extensive repairs a commercial plumber or residential expert can identify and fix issues efficiently. Safety and Best Practices Use high-quality pipe materials. Always follow the bathroom rules in your area. Set up checks before putting up the plasterboard. Label all the
What Is a Plumbing Vent Pipe and Why It Matters
What Is a Plumbing Vent Pipe and Why It Matters A plumbing vent pipe is an important part that keeps everything going smoothly. When you think of plumbing, you probably think of water supply and drainage. Most of the attention is on pipes that carry water and waste, but air pipes keep your system safe, clean, and working well. Your sinks, toilets, and drains wouldn’t work right without a good plumbing vent pipe. This guide describes air pipes, why they’re important, common problems they can have, and how to keep them in good shape. What Is a Plumbing Vent Pipe? A vent pipe which is also known as a vent stack does not carry water or trash. Instead it keeps the air pressure in your drainage system in check and lets sewer gases escape safely through the roof. You can think of it as the “breathing mechanism” for the pipes in your home. The same way that your lungs need air to work your drain lines need air flow to keep wastewater moving. Why Plumbing Vent Pipes Are Important Vent lines are very important to the health of your home, even though you can’t see them. This is why they’re important: Prevents Sewer Gas Build-Up Dangerous fumes, like methane, could build up inside without vents. They can get out of the building through a vent pipe. Maintains Water Seal in Traps A P-trap holds water to keep sewer gases from getting through. It’s in every washbasin and toilet. With the right opening, that water seal stays in place. Ensures Smooth Drainage Ventilation prevents negative air pressure that would otherwise slow or stop drainage. Protects Plumbing Fixtures From the washbasin in the kitchen to the toilet in the bathroom, properly vented drains reduce clogs, gurgling noises, and backflow. How Plumbing Vent Pipes Work The vent stack usually runs vertically through your home and exits through the roof. Putting trash water down a drain can make suction that can pull water out of traps nearby. The exit pipe lets air in to keep the pressure even, which keeps the water in the trap and the gases out. Common Problems With Plumbing Vent Pipes Systems that are built very well can still have problems with draining. Here are some problems that homes often have: 1. Clogged Vent Pipe Roof vents can get blocked by bird nests leaves or other junk. This makes sinks move slowly smell bad or make gurgling sounds. 2. Poor Installation If a house’s venting system doesn’t follow building rules it could lead to flooding issues that happen often.2 3. Frozen Vent Stack When it’s cold outside, vent lines can freeze, which traps gases and makes the system less efficient. 4. System that is old or broken Some old homes may have polybutylene lines or other old materials that don’t work as well as they should. Find out more about water issues with polybutylene. Signs Your Plumbing Vent Pipe May Be Failing Strong, unpleasant smells inside the house Toilets or sinks that gurgle bathtubs or baths that drain slowly Toilet bowls’ water amounts going up and down backed up sewers, especially after it rains If you notice these signs, you should call a plumber instead of trying to fix it yourself, which could be dangerous. For some problems, like roof vents that are jammed, you need special tools and to be careful. DIY Plumbing Tips for Vent Pipes While big fixes should be done by a professional, here are some plumbing tips that anyone can try: Visual Inspection: Look for things that you can see in the roof vent. Use a Garden Hose: Gently flush the vent to get rid of any clogs. Plunger Method: Sometimes plunging a sink or toilet can clear minor airlocks. See these do-it-yourself plumbing tips for your kitchen sink and bathroom for more step-by-step help. When to Call a Plumber If vent problems don’t go away, you need to call a qualified plumber right away. Professionals can use special cameras to look inside lines and find blockages that are hidden. For instance, if you live in Georgia and need a plumber, hiring a Lawrenceville plumber from your area will make sure you get help quickly and in line with local rules. For certain issues, like low water flow, you’ll need a plumber who knows how to fix more than just venting problems. To fix low water flow, learn how to find the best plumber. Cost Considerations for Vent Pipe Repairs The cost of vent repairs depends on: Where the blockage is (on the roof or underground) How long your plumbing has been around How hard it is to change where pipes go or replace them Vent problems can happen at the same time as replacing fixtures. For instance, replacing a trash disposal might show that the venting isn’t working right. Check out the plumber cost to replace a garbage disposal for insights. What Plumbers Handle Beyond Vent Pipes Vent pipes are just one part of a plumber’s expertise. They also handle: Commercial plumbing services Fixture installations and repairs Sewer line replacements Emergency drain cleanouts (see this plumbing cleanout guide) Many homeowners are curious about the profession itself—like how long it takes to become a plumber or the differences between plumber pay rate vs. hourly rate. Best Practices for Modern Plumbing Systems To keep the vent pipe and the rest of your drainage system healthy: Plan checks once a year Keep things out of roof vents. Update old tools to meet today’s standards Use devices that save water to ease the strain. And while men have traditionally been more likely to work in plumbing, that is starting to change. Meet some female plumbers who are breaking gender norms and making home services better in the future. Conclusion The plumbing vent pipe is the unsung hero of your home’s drainage system. It keeps sewer gases out of your home, makes sure water flows smoothly, and makes sure faucets work right. Vent lines are important to know about whether you have a clogged vent or are
How to Handle Hot Water Heater Repair Safely
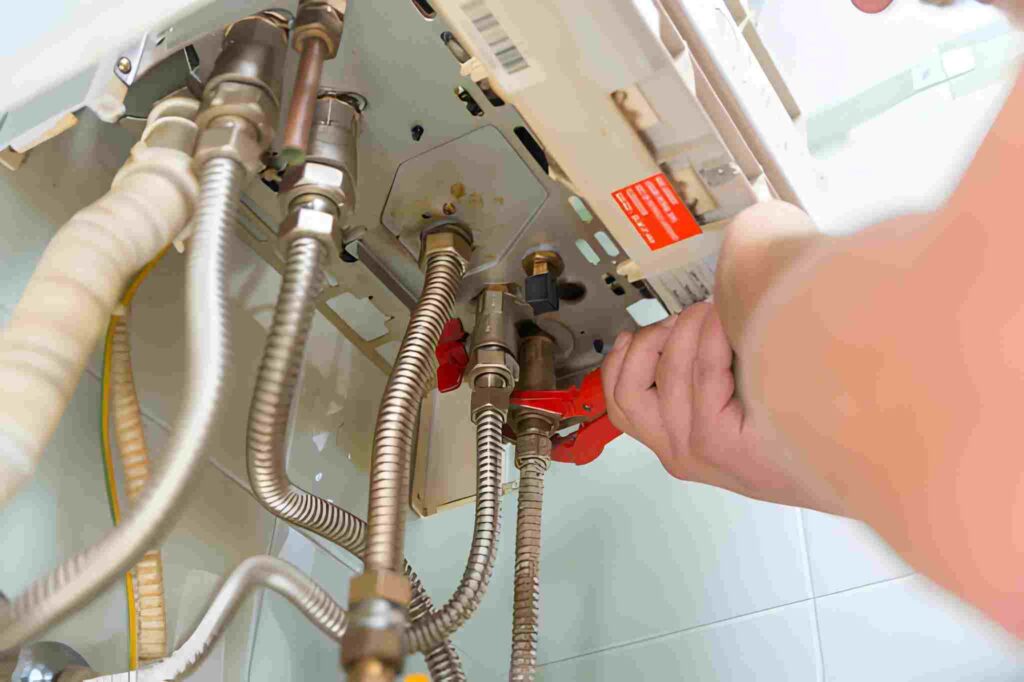
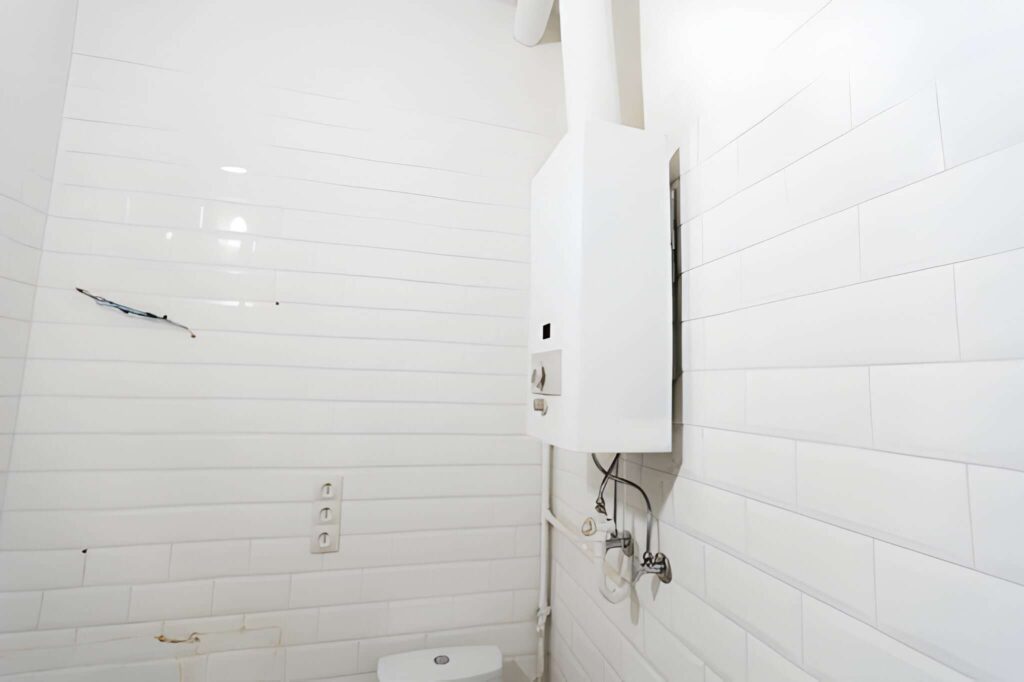
How to Handle Hot Water Heater Repair Safely It’s important to have a hot water heater for regular comfort, like when you take a shower, wash food, or do laundry. But if something goes wrong, it can be dangerous to try a hot water heater repair without the right tools. To fix these units, you need to know about safety, have the right tools, and know how your system works. This is because there are risks like gas leaks and electricity dangers. This guide will tell you how to fix things, how to keep them in good shape, and when it’s best to call a professional. Why Hot Water Heater Repair Safety Matters There are risks when working on a water heater, such as getting burned by hot water, gas leaks, or electric shocks. If you don’t follow safety rules, you could get hurt or even damage the system in the long run. You and the thing you’re fixing will both be safer if you do it properly. For example, checking the anode rod on a water heater on a regular basis can stop rust inside the tank, which means that fixes are needed less often and cost less. Problems that happen a lot and need hot water heater repair No Hot Water – Most of the time, this is because the thermostat, heater element, or pilot light is broken. Leaking Tank – It could be that the tank is rusty or the air opening is worn out. Strange Noises – If dust and dirt get into the heater, it could make noises that sound like popping or grinding. Low Water Pressure – It can be hard for air to move when minerals build up in the unit or in the lines. Error Codes – Tankless heaters like Navien show numbers like Error 110-01, which usually means there is a problem with the burning air source. (Learn step-by-step fixes in this guide: How to Fix Navien Tankless Water Heater Error 110-01). Safety Precautions Before Starting Repair Turn Off Power Supply Electric Heater – Switch off the breaker. Gas Heater – Shut off the gas valve. Shut Off the Water Supply Close the cold water valve to stop leaks or flooding that happen by mistake. Release Pressure Before touching a hot water unit, you should always open the faucet to let the air out. Wear Safety Gear When working with gas or electricity you must wear gloves masks and tools that are insulated. DIY Hot Water Heater Repair Steps Some fixes should be done by a professional but if you’re careful you can handle small problems yourself: Flushing Sediment Buildup Sediment makes the heater less effective and can hurt the tank. Knowing how to flush a water heater on a daily basis will help it work at its best. Replacing Heating Elements Electric heaters often don’t have hot water because the heating parts are broken. Replacement is straightforward but requires cutting power supply first. Checking the Anode Rod Your tank won’t rust because of the anode rod in your water heater. It can save you a lot of money in repairs or replacements if you change it every 3–5 years. Inspecting the Thermostat Check the thermostat with a tester to see if it is working right, and if it isn’t, replace it. When to Call a Professional You shouldn’t deal with every problem at home. Get in touch with a trained technician if you see: There are gas leaks or the smell of bad eggs. Keep getting error codes like Navien’s Error 110-01 even after fixing the problem Big leaks in the tank Problems with electrical wires It may be cheaper to replace something than to fix it over and over again. In that case, you might want to look into energy-saving options, like a portable water heater for smaller needs, or even a tankless system. Preventive Maintenance Tips Every year, clean the tankless water heater to keep it working well. Keep an eye on the pressure and make sure that the cost of installing your water heater includes an expansion tank in case you need one. For homes that need hot water often, learn about fast water geysers that heat water quickly. To save money on your energy bills keep up with electric pump tips. Conclusion Plan ahead have the right tools and know your limits before you try to fix a hot water heater. You can do simple things like flushing sediment or changing the anode rod at home but you should call an expert for bigger problems like Navien Error 110-01 or gas leaks. You can keep your water heater working well and make it last longer by giving it regular care and following safety rules. Questions People Ask Q1:How often does the water heater need to be cleaned? You should flush your water heater at least once a year. If you live in a place with hard water, every six months is better. Q2: Why does a tankless water heater need to be cleaned? It gets rid of mineral buildup and limescale which cleans the system. It works better and lasts longer if you clean it often. Q3: How can I tell if the anode rod in my water heater needs to be changed? Replace this rod if the water smells bad or has rust in it, or if the heater doesn’t last as long. Q4: What is the cost of water heater installation? The price is based on the type, size, and cost of work. On average, it ranges between PKR 25,000–60,000. Q5: My Navien tankless water heater shows error 110-01. How do I fix it? This usually happens due to airflow or exhaust blockage. Cleaning the vent and checking the fan can fix it External References The Spurce – Water Heater Problems
How to Fix Navien Tankless Water Heater Error 110-01
How to Fix Navien Tankless Water Heater Error 110-01 ANavien and other tankless water heaters are known for being reliable and efficient, but they can still have problems. Navien tankless water heater external vent blockage error 110-01 is one of the most common problems people have with their water heaters. If you see this code on your unit, don’t worry—it can usually be fixed by troubleshooting. You will learn what error 110-01 means, why it happens, and how to safely fix it in this guide. What is Navien Error Code 110-01? If you get the error 110-01 on a Navien tankless water heater, it means that the outdoor exhaust is blocked. This means that the combustion gases are not getting out of the venting device as they should. The water heater turns off to protect you from carbon monoxide risks when airflow is blocked. Causes of Navien Tankless Water Heater External Exhaust Blockage Error 110-01 There are a few things that can cause the error: Vent Pipes Blocked There may be ice, bird nests, or other things stuck inside the vent. Installing a vent incorrectly Not enough space or the wrong slope. Clogged Air Intake Dust, dirt, or foreign objects restricting airflow. Faulty Exhaust Fan The blower motor may fail or slow down. Moisture Issues Condensation freezing in cold climates. Oversized Vent Length Longer vents than recommended by Navien specs. How to Fix Error 110-01 Turn Off the Heater Before you look at it, turn it off and unplug the power. Inspect the Exhaust and Intake Pipes Look for ice snow or nests on the outside vent connections. If it’s frozen use a brush or warm water to remove anything that is in the way. Make sure the vent pipes are far enough away from walls or other items (12 inches is the norm). Clean the Air Intake Filter The filter can be found on the water heaters side. To get rid of dust and other things, take it off and rinse it with warm water. Before putting it back let it dry all the way through. Check for Proper Venting Installation Make sure the length and angle of the vents follow Navien’s instructions. Cut vents that are too long or rearrange pipes that were put wrong. Inspect the Exhaust Fan Pay attention for strange sounds coming from the fan. If the fan is weak or not spinning it may need replacement. Reset the Water Heater After clearing obstructions and cleaning filters restore power. There is an error code. To clear it, press the reset button. Preventing Future Error 110-01 Occurrences Make an appointment with a qualified technician for yearly maintenance. Put up air screens to keep bugs and birds out. In cold places insulate vent lines to keep them from freezing. Clear away any snow and other things that might be in the way of the vent connections. To keep your unit running smoothly, clean it regularly (see Tankless Water Heater clean). Related Maintenance Resources How to Flush a Water Heater – Prevents sediment buildup. Gas Water Heater Repair – If dealing with gas-related issues. Heat Pump Water Heater vs Tankless – Helps you evaluate different systems. Cost of Fixing Navien Error 110-01 DIY cleaning: $0–$50 (basic tools). Professional service: $150–$400 depending on venting or part replacement. Blower motor replacement: $200–$500. When you think about how much it costs to put a new water heater, fixing error 110-01 is often the better option. Conclusion The navien tankless water heater external exhaust blockage error 110-01 may seem intimidating but in most cases it comes down to blocked vents dirty filters or minor installation issues. You can make sure your Navien unit keeps working well and safely for years by following the steps above for fixing and setting up regular maintenance. Would you also like me to make a troubleshooting checklist table with (symptom, cause, answer) so that people can quickly look through fixes for error 110-01? Question That People Ask A Lot 1. What does error code 110-01 mean on a Navien tankless water heater? It shows a Navien tankless water heater external exhaust blockage error 110-01 which means that the system can’t properly release gases because it’s blocked or broken. 2. Can I fix error 110-01 myself? Yes, in many cases. You can clean the air intake filter and clear snow, dirt, or nests out of the vent lines. If you are having problems with your fan or the installation, you should call an expert. 3. How do I prevent exhaust blockage errors in the future? Clear snow regularly in winter. Install pest screens. Schedule annual professional maintenance. 4. Is error 110-01 nothing to worry about? Yes, Ignoring the error can lead to carbon monoxide buildup, which is hazardous. Always address it promptly. 5. Does this error mean I need a new water heater? Not necessarily. Most of the time, cleaning vents or replacing a fan resolves it. Replacement is only needed if the system is old or repeatedly failing. External Reference JustAnswer-Water Heater Error 110-01
How to Replace a Water Heater Anode Rod Easily

How to Replace a Water Heater Anode Rod Easily Water heaters are important home appliances, but they can break down faster than thought if they aren’t taken care of properly. The anode rod is one of the most important parts that people often forget about. If you’ve been noticing dirty water, bad smells, or less efficient heating, it may be time to change the anode rod in your water heater. This step-by-step guide tells you everything you need to know. Why the Anode Rod Matters It’s a metal stick that’s inside your water. Heater’s tank that is used as a sacrifice. It is usually made of magnesium, aluminum, or zinc. Its main job is to pull in minerals that are bad for the water which keeps the steel tank from rotting. The rod wears out over time and needs to be replaced to make the heater last longer. Benefits of Replacing the Anode Rod Keeps the inside of the tank from rusting and damage. Reduces the taste and smell of metal in water, which makes the water better. Makes your water heater last years longer. To keep your heater in great shape, you can also read tips like “How to Flush a Water Heater.” Signs You Need to Replace the Anode Rod rusty or cloudy water coming out of the faucets. Rotten egg smell (caused by sulfur bacteria reacting with a depleted rod). Loud popping or rumbling sounds from sediment buildup. The rod looks thin, coated, or almost dissolved when inspected. The rods in your water heater haven’t been changed in more than three to five years. Tools and Materials You’ll Need Before you change the water heater’s anode rod, make sure you have these things: A tool or a breaker bar Tape that doesn’t stick Garden hose (to get rid of water) New anode rod (check the heater’s instructions to see what kind and what size it is) Plumber’s tape or pipe dope Safety glasses and gloves Replacing the Anode Rod Turn Off Power and Water Supply Cut the power to the water heater if it’s electric. For gas water heaters, turn the gas knob to “Pilot.” Close the hole that lets cold water in. Get rid of some water Connect a line to the drain valve on the tank. Drain out a few gallons of water (enough to lower the level below the rod’s position). Locate the Anode Rod Most rods are found under a hex head fitting on top of the tank. You can connect them to the hot water outlet on some types. Remove the Old Anode Rod To loosen it use a socket wrench and some strength. If it’s really stuck, use penetrating oil or a breaker bar to get it free. Put the new rod in. Put Teflon tape on both ends of the new rod. Before you put it in the tank make sure it’s tight. Refill and Restart Turn on the cold water and let the tank fill up. Turn on the gas or electricity to the heater again. To get rid of trapped air open a hot water faucet. Types of Anode Rods Magnesium rods – Best for soft water, offer strong protection. Aluminum rods – Good for places with hard water. Zinc-aluminum rods – The smell of rotten eggs goes away quickly. Powered anode rods – For long-term safety, use energy instead of metal as a sacrifice. Maintenance Tips After Replacement Check the rod every two to three years. Keep the tank clean (see Tankless Water Heater Flush). To keep the air from going down, check other parts like the Water Heater Expansion Tank. See Gas Water Heater Repair if you find leaks or other problems with gas. Common Mistakes to Avoid Forgetting to turn off the gas or electricity before starting. Not letting enough water run, which leads to spills. Not having the right rod type or size. Cross-threading the new rod during installation. Ignoring other maintenance needs like flushing and descaling. Cost of Replacing an Anode Rod DIY replacement: $20 to $50 (for the stick alone). Professional service: $100 to $300 (for work and parts). Compare this to a full water heater installation cost which can run into hundreds or even thousands. It’s clear that proactive replacement is the better option. Conclusion Getting a new anode rod for your water heater is an easy but effective way to keep it in good shape and make it last twice as long. You can avoid rust, save money, and have clean hot water for years if you know what you’re doing and have the right tools. Check and replace your anode rod often, rather than waiting until your tank breaks. Frequently Asked Questions (FAQs) Q1. How often should I replace the anode rod in a water heater? Most experts say that you should change your water heater’s anode rod every three to five years, based on the quality of your water. If you live in a place with hard water, you might need to check it more often. Q2. What will happen if I don’t change the anode rod? If you let the rod rust all the way through. In the end, this can cause leaks, bad smells, and the need for an expensive repair. Q3. How do I know what type of anode rod to buy? Open the instructions for your water heater. Magnesium, aluminum, and zinc-aluminum bars are all common choices. To keep their homes safe for a long time, some people put in powered anode rods. Q4.Should I call a professional or can I change the anode rod myself? If you know how to work with pipes, you can change it yourself with some simple tools. Call a plumber if the rod gets stuck or if you’re not sure about safety. Q5. Will replacing the anode rod fix smelly water? Yes, in many cases. A zinc-aluminum rod is often recommended for solving the rotten egg smell caused by sulfur bacteria. External Resource King Heat-Water Heater Anode
How to Handle Gas Water Heater Repair Safely
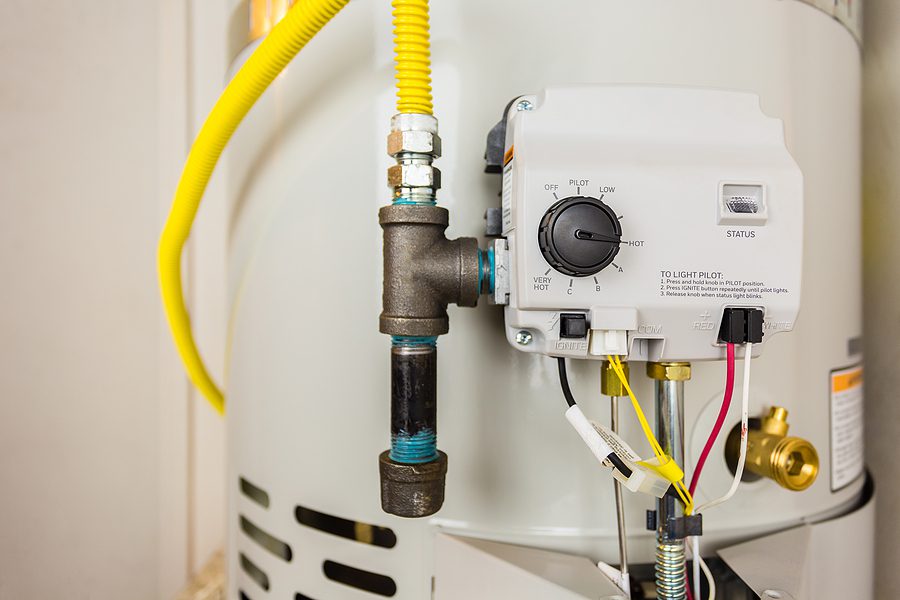
How to Handle Gas Water Heater Repair Safely It might sound easy to fix a gas water heater, but you have to be very careful because you will be working with gas lines, fires, and heated water. If your gas water heater is making noises, having trouble staying lit, or the water temperature changing, learning how to fix and maintain it properly can keep you safe and make it last longer. This piece will talk about safe ways to fix things, common issues, skilled vs. do-it-yourself repairs, and important maintenance tips. Why Gas Water Heater Repair Matters Gas water heaters are a safe way for homes to get hot water, but they need to be serviced regularly. Untreated gas leaks, carbon monoxide dangers, and silt accumulation can cause costly crashes. The U.S. Department of Energy says that heating water uses about 20% of all the energy that homes use. For this reason, it is crucial to prioritize safety and efficiency. Common Issues with Gas Water Heaters Before you try to fix a gas water heater, here are some things you should know: Pilot Light Issues: The thermocouple may need to be fixed or replaced if the light goes out a lot. Sounds Like Shaking or Popping: It sounds like the tank is shaking or popping. No Hot Water: The stove, gas line, or thermostat might be broken. Leaks Around the Tank: There could be rust, weak links, or too much pull. Gas Smell: Are telling you that you need to get help right away. If you smell gas, leave right away and call the gas service company in your area. You shouldn’t try to fix things yourself. Safety Precautions Before Any Repair Before you start fixing your gas water heater, do these things because working with gas is dangerous: Turn Off the Gas: Turn off the gas valve to stop leaks. Flip the Switch: For heaters with electric parts, turn the switch to “off.” Allow Cooling Time: It’s dangerous to work on hot water tanks right away; let the system cool down first. Ventilate the Area: Make sure air can flow well so gas doesn’t build up. Use Protective Gear: Gloves, goggles, and a mask keep you safe from dust and burns. Gas Water Heater Repair Basics Here’s an easy way to fix problems yourself (only for small ones): 1. Pilot Light Troubleshooting Take off the cover and look at the flame. A soft brush can be used to clean the flame and pilot mechanism. To change a thermocouple that is broken, follow the instructions that came with it. 2. Flushing the Tank Buildup of sediment makes things less effective. Learning how to flush a water heater makes it work better and last longer. 3. Checking Gas Connections Put a mix of soap and water on the fittings. Look for bubbles. They mean there is a gas leak. Call a professional right away. 4. Replacing the Anode Rod Inside the tank, the anode bar keeps rust from building up. If more than 75% of it is rusted, check it out and replace it. 5. Adjusting the Thermostat To be safe and get the best results, Put it somewhere between 120°F and 140°F. Lower levels save energy and lower the risk of getting burned. When to Call a Professional You shouldn’t fix all of your gas water heater problems by yourself. For help, call a plumber or technician if you see any of these signs: A strong gas smell. There is water under the heater. The burner mechanism doesn’t work right. Carbon monoxide detectors sound the alarm. Major leaks or rust in the tank. Check out this full guide on how much it costs to install a water heater for big jobs or to repair an old one. Preventive Maintenance Tips Repairs are less likely to need to be made when frequent care is done: Do a portable water heater flush or a tankless flush once a year. Every 6 to 12 months, check and clean the burners. Check to see if the pressure release valve works right. You can add an overflow tank to your water heater to protect it from damage caused by too much pressure. A professional should look at it once a year. Compare other choices, like a heat pump water heater to a movable system, to find ways to save even more energy. Conclusion Gas water heater repair needs to be a careful mix of skill and safety. You can do things like flush the toilet or change the temperature in your home. But gas leaks, burner systems, and other hard parts should only be worked on by pros. Take good care of your gas water heater, follow safety rules, and have a professional check it out every so often. It’s safe and will give you hot water for years. FAQs For Gas water heater repair Q1. Can I fix my gas water heater myself? Simple operations, such as re-enabling the starting light, may be safe if performed in accordance with the manufacturer’s instructions. Repairing gas pipes and switches, however, requires special training. Q2. How can I tell if I need to fix my gas water heater? There are often signs like things that don’t make sense, the smell of gas, or a pilot light that keeps going out. Q3. How often should I do maintenance on my gas water heater? It is essential to perform this annually to ensure your gas water heater remains safe and operational. Fix things regularly to avoid costly failures. Q4. What should I do if I smell gas near my water heater? Immediately turn off the gas, ensure that air circulates in the area, and then contact your gas company or a plumber. Don’t try to fix things on your own in this case. Q5. Is it possible to make my gas water heater last longer by maintaining it? Without a doubt. In order to guarantee that the heater continues to function at its best and that it will last for a long time,